Thursday, September 10, 2015

~Beauty Review: L'OREAL Paris Magic Skin Beautifier BB Cream Anti-Redness (Green)~


Hi guys! I'm back with a drugstore beauty product on this lovely Saturday ^.^ I don't usually buy drugstore products because I worry about my sensitive skin. But I really wanted to try an anti redness product because of my recent redness flareup from experimenting with hair removal strips 3: I found some online that I wanted to try, but I didn't want to spend money on the good stuff until I knew if the green color theory thing actually worked! As it turns out, the cream I wanted to buy online was actually cheaper than this one that I bought at the drugstore T___T Oh well hahaha~

***TL;DR at the bottom of this post!! ^.^***

Anyways, we went to Walmart so I could pick up some supplies for upcoming DIY projects I have! And while looking for my mom in the cosmetics section I remembered that I was looking for a green primer! Instead I noticed that these green BB creams by L'OREAL were almost all gone. So I did the thing where I thought that since they were all gone they must be popular and work well! lol. I think it was a bit over $8 after taxes and the one I wanted online was $6 phooey.

The next day I decided to try it out! Even though we were only going local hahaha~ I actually ended up being glad that I bought a BB cream instead of looking for a green primer or base just because I like my current primer and my BB cream/sunscreen for summer kind of washes me out a little hahaha.

Ingredients! Sorry if you can't read it super well D:

Promises to neutralize redness, correct skin color evenness, hydrate skin, and perfect skin. Also claims to be non-comodogenic and will not clog pores. Coolio. 

This L'OREAL BB cream claims that it "transforms to universal shade to reduce the look of redness" and I thought to myself, what is a universal shade? Uhh?

When I first opened it up I was pretty surprised lol. It's so liquid-y!!! It's thicker than water but flows like it. I was borderline disappointed with that at first. But I thought to myself, maybe I just need to shake it first? SO I closed it back up and shook it. Opened it up again, still the same consistency lol. I thought to myself, "oh man, is this a dud?!".

Before trying out the BB cream I just put some primer on:

Just the primer I always use: smooth and silky feeling, Smashbox Photo Finish.
Redness is mostly on my cheeks 3: In the most natural lighting I could find by the window in my room hahaha.
I hope you can tell here, but there are little grey/brown looking flecks in the green! These are the Beautifying Beads that apparently transform and blend to your skin tone while correcting redness.

Testing it on one side of my face first to see.
After blending with my stippling brush that I got with my Pur Minerals foundation.

On the left of this picture I have just primer, on the right I have primer and the BB cream.
Whole face with primer+BB cream and translucent powder for oil control as well as a bit of eyeshadow from my Too Faced Chocolate Bar Palette <3

In less natural bathroom lighting ahhaha.

I didn't add concealer or anything since it hit the redness pretty well. I could still see the spots but they were a muted tan color rather than pinky red after applying the BB cream, which was better I think.

***TL;DR:
Consistency 7/10: It's so runny it's kind of annoying to put on. Maybe I just don't know enough about makeup yet? Is this supposed to be runny like this? I mean it's fine on my actual face because it's so runny and light it's like I'm hardly wearing makeup. So I'll give it props for that. Maybe I'd like a whipped cream better because that's light but not runny to put on? Hmm I'll look into that.

Coverage 8/10: I like this compared to my other BB cream right now since I'm still slightly tanner than I am the rest of the year since summer is setting. This one doesn't wash me out like my other BB cream, yay! As for covering redness, this coverage is nice and light and makes my makeup look natural~ At first I couldn't even tell if it worked or not and I'm not sure how I feel about that so for now I'll give this an 8 out of 10 since it's the first green tinted anti redness cream I've tried and I have nothing to compare it to yet hahaha.

Scent 7/10: It has a chemical smell that you get used to once you put it on. It isn't overpowering put it is a little off putting at first I must say. After putting on the rest of my makeup I didn't seem to notice it, so I guess the scent it ok.

Ease of use 5/10: Like I said, since it's so runny it can be difficult and messy to apply sometimes.

Works overall 7/10:It hasn't caused me to break out yet! And I've been using it for about a week now so that's pretty nice :D Doesn't seem to irritate my skin and it doesn't wash me out like my other BB cream. So I guess that means it's working for me for the most part right now. Nice.

Would re-buy?: Even though I have nothing to compare it to right now I don't think I would re-buy. Most other months my face is somewhat pale anyways. And I noticed that this BB cream oxidizes and turns an orange-y shade so unless your natural skin tone blends well this this orange-y tone I don't recommend this. I'm not disappointed but I'm not sprung either. Just neutral about this right now I guess?

Thanks for reading as always!! I might keep a lookout for other green BB creams to compare to this on in the future. I will keep you updated on how I feel about this lol.

xoxo Abby

Tuesday, September 8, 2015

~DIY: Denim A-line Skirt~

Hi everyone!! How long has it been since I did an actual DIY post? Was it my Shrinky Dink adventure? Wow so I guess it really has been awhile!! If you have been craving a DIY post on my blog I have one today that I'm super excited about!

Image/skirt via Primark. I love the shape and fit of this on other people, when I try skirts like this on I feel like I'm squished in a tube of denim hahaha~

Image/skirt via Aliexpress. This is what I was going for in my tutorial!


I have been wanting an a-line skirt for FOREVER. And I know I like to avoid jeans and pants in general, but I will make an exception for denim skirts and jackets. They just seem to go with everything, ya know? SO I finally decided that I should just give in and learn how to make a-line skirts myself ^.^
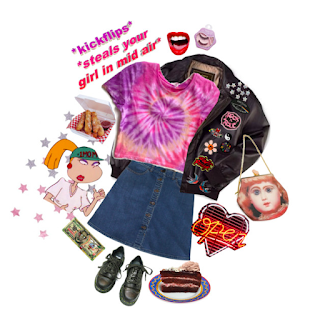
A set I made on my Poly using an a-line denim skirt ^.^

Another one of my sets with an a-line skirt.


If you follow me on Polyvore you will see that I make quite a few sets with a line skirts. But I could never find ones that fit me the way I want them to? Or fit me at all for that matter! The larger sizes fit my waist but tend to fit me like a loose tube around everywhere else. And the non plus size sizes fit my curves nicely but either pinch at my stomach and give me muffin top or don't close altogether. This is the struggle I have found with a-line skirts hahaha. Things not fitting me or aren't designed exactly how I want them is usually how I end up making my own clothes and pins and stuff.

So let's get started, shall we? :D

Materials:

Not all materials shown ^>^ Also my template is already made here.


-LARGE piece of paper for your pattern(think old newspaper large, big old paper bag cut open, actual sewing pattern making paper etc. I used one piece of large drawing paper plus one regular notebook sized piece of paper for my pattern)
-scissors: I have a pair I use exclusively for fabric and one that we use around the house for crafting and things.
-sewing machine, needle, and thread that matches or looks good with your fabric! I'm working with denim in today's tutorial so on the darker skirt I used basic black fabric and on the lighter one I used a tan/brown color that you often see with denim and stitching on jeans. I also used a jeans/denim needle for my sewing machine which is sturdier and larger than the universal sewing needle, even though my denim wasn't super thick or anything ^.^
-pins
-elastic for the waist band: I recommend at least an inch or larger for skirts with thicker fabric or else it looks kinda weird? You could make this skirt with or without elastic, I'll explain later!
-fabric pen/pencil for tracing on your pattern
-measuring tape
-buttons: I used the ones that are usually for jeans closures and overalls and things
-medium weight denim fabric (although you could technically use this tutorial for non denim a-line skirts as well!!) I bought a yard and used less than a yard for this tutorial.
-tape
-zipper (if you aren't doing elastic!)

Before we start cutting away on our fabric, the first thing to do is take a few measurements and make a pattern for your a-line skirt. Personally, the easiest way I've found to do this was to use what is called the split and spread method! It gave me the right shape that I wanted for my skirts and allowed me to control my measurements easier.

Measurements:
Measure the largest part of your lower body: you need to be able to pull your skirt on! If you're making an elasticized skirt like I did, this means you have to measure enough fabric so you can put it on. If you just use your waist measurement you might not be able to do that. For me my largest area was around my bum to the front like so:


If you aren't doing the elasticized waist then just measure the area where you want your skirt to sit like your waist:

Add maybe an inch or inch and a half for extra seam allowance (especially if you're just beginning and sew weird like I used to hahaha) and room for a zipper!

The circumference of my bum and around was about 44 inches according to my tape. Take this measurement and divide it by 4=11 inches. This is the waist measurement of the QUARTER pattern you will be making with your large piece of paper. And for non elasticized do the same thing, take your waist measurement and divide it by 4. Mine was 40 inches/4=10 inches. If your waist is the largest part add maybe three more inches to your waist measurement for breathing room~

Now take your piece of paper and draw a line across the short end of the paper (if you have a rectangular sheet, if not it doesn't matter) with the quarter of your measurement:


This piece of paper is just being used as an example, pretend that's 11 inches for me, ok? lol Now you need to decide how long you want your skirt to be. Here is where I measured:


For the waist band I used the fold over method so you want to take the width of your elastic ( I used 1.5 inch elastic) and double that, plus maybe half and inch of seam allowance and wiggle room for when you put the band through. This method of creating a waist band also applies for the non-elasticized version as well! So I just took the length of the skirt I wanted (about 15 inches) and added 1.5*2=3 inches plus two extra inches for seam allowance and taking into account that the bottom of the skirt needs to be hemmed! I always say making the garment too big or long on accident is much better than finding out it's too small or short! So be free with your seam allowances people! :D My total length ended up being about 20 inches so make sure your paper is this length. If the paper is short then add extra paper at the bottom to make it long enough!

Now fold your paper in half as straight as you can, length wise:


And cut ALMOST all the way to the top. DON'T CUT ALL THE WAY UP!!


See how it splits and makes a nice triangle down the middle but the paper is still connected? Yup! That's what you want! Now it's all up to your preference! The wider your make the triangle, the more flared your a-line skirt will be!

Skinnier triangle means less flared like the first a-line skirt at the top of this post.

Wider triangle will make a more flared a-line like in the second picture and is like the one I made!


On the right side of my pattern I made a note "ON CLOSED FOLD" meaning that edge of the pattern will be on the fold when you are tracing your pattern onto your folded fabric. You will see what I mean down below~


Now you just want to fill in your pattern with more paper and some tape to complete your template now that you've got how flared you want your skirt to be! And once you have it all filled in we can start attacking the fabric! Woo hoo!

All filled in!


Make sure your fabric is pre-washed so you know how much it shrinks before sewing with it! I always forget to mention this step hahaha.

Fold your fabric lengthwise or "hot dog style" with right sides together so the inside of the denim fabric is facing outwards like so:

On the right of this pic is the closed/folded edge.

Now place your quarter template so the side that you marked "ON CLOSED FOLD" is on the folded end of the fabric:


Trace and cut!

With my actual pattern ^.^

In the process of being cut.


Yay now you've got a front piece of your skirt!

What I've learned has worked best is to have a slightly bigger piece for the front of the skirt and a slightly smaller piece for the back side of the skirt. It just balances nicer I guess? Since you will be cutting up the front of the skirt for the button up area later on!

So for the back piece I set my pattern slightly off the fabric to make it a tad smaller. This is why adding those few extra inches when making your pattern is important! Trace and cut again! Now you should have two pretty much identical pieces of denim skirt looking things, one slightly bigger.

Top one is slightly bigger!

Fold the larger piece in half as straight and carefully as possible and cut up! If your cutting skills aren't so great, it might be a good idea to use a ruler and measure to the middle of the fabric and draw a line and follow it with scissors instead of folding it and winging it hahaha. Just in case! I also marked the side I cut up (the middle) on the inside of the fabric so I knew where the middle was, like so:


Marked the middle.


You should now have three pieces of fabric to work with! And now most of the hard stuff is done!! You're doing great!!

After zig-zag stitching the edges.
In the past I've learned a lot about different stitching techniques, what works best and what doesn't work so well. I have also worked a bit with different fabric types. Denim is a fabric that doesn't fray  TONNN but still frays a bit, especially when put through the wash. And it can get annoying to have loose ends. So I highly recommend you zig-zag stitch around all your cut edges so your fabric frays less as you work with it and wear it eventually! Make sure you read your manual to get the settings on your machine just right! And don't forget to use your zig-zag foot! Or you might break your needle :O

Ok now all the edges are taken care of! Yay! Now let's work on the waistband:


The best method I've found so far (although it can be a bit tedious!) is to set the elastic at the waist, fold the fabric overtop of it (on the inside of the skirt), and pin. I also pull the elastic through while I'm doing this to make sure I didn't pin through the elastic or make the waist casing too small on accident! Knowing the elastic has made it through the tube at least once since I'm continually pinning it through this way, makes it easier to actually thread through later. When folding your waistband over make sure you leave enough edge space to sew on without difficulty of sewing too close to the edge or the waistband! Just do this on all three pieces, straight stitch from the inside so you can see where you're going ^>^ This is also a good time to hem the bottom of the skirt. Fold your hem up twice and straight stitch! You should measure the current length of your skirt before hemming since you have the waist casing done at this point so you know how much room you have to work with when hemming.


Now let's see how well it fits! Get your pins out and pin the edges of the skirt together, right faces together, and try it on. If you aren't using elastic it should fit your waist nicely with maybe an extra inch for sewing the buttons up the front! The length of the skirt should also be where you want it at this point because the waist and hem should be done! If you are using elastic it should be quite loose still, a couple inches loose actually! This is good! Once you are satisfied with the fit of your skirt, straight stitch up the edges of the inside of the skirt (right sides together and pinned together like you want it) STOP BEFORE YOU GET TO THE WAIST BAND IF YOU ARE DOING ELASTIC!!

Pin right sides together.

ALMOST all the way up, stop pins at waistband and don't sew past it or you won't be able to get your elastic through!


If you are doing the zipper method decide whether you want it up the front like on regular denim skirts (advanced method) or on the side (easier/beginner method). You can sew up the waist band if you are adding the zipper up the middle, if on the side leave one side of the skirt un-sewn but sew up the other side all the way to the waistband.

More than halfway done! Doesn't it look great? Now that you have the waist casing sewn it's time to put the elastic through! I don't really actually measure my elastic, I just put it around my waist and cut as much as is comfortable! Then I attached a safety pin to the end that I'm threading through the casing and just push the elastic through!

Have one safety pin on the end you're threading through the waist casing, and one on the other end attached to the opening of the casing where you started so the elastic doesn't pull through the skirt with the rest of the elastic!

One tip is to take the lagging or following end of the elastic and attach another safety pin to that as well and pin it to the opening of the waist casing where you first started threading the elastic through. This ensures the elastic winds up on both ends of the skirt and you don't accidentally pull it all the way through! To keep the elastic in place while finishing up the rest of the skirt I just sew the ends of the elastic inside the casing.

If you are doing a zipper here is a link that will help you with inserting zippers.


Now it's time to add the buttons and finish up your skirt! I used these hammer in buttons from the fabric store that are usually used with denim projects like jeans and overalls. To get the right spacing I measured from about where my waistband ended where I wanted my buttons to start, to the bottom of the skirt. The length was about 16 inches and I divided that by the number of buttons I wanted down the front of my skirt which was six. 16/6=about 2.6 so I did 2.5 marked spacing about an inch from the edge of the inside of the skirt. Then I hammered in my buttons!

The finished product!


All that's left is to straight stitch both sides of the skirt together!

I think the first one I made (a darker denim) is cuter but oh well~

A bit lighter in person but this is a weird angled picture anyways haha~
I may or may not be standing on the counter. Shh don't tell LOL 


Cute right? I love the flare of these! It isn't frumpy or tube-y looking and it FITS!! WITH SPACE! Because, ya know, elastic is the best lol. Sorry I talk too much ahhaha~

Hope you try out this tutorial! I'd say this is a medium-mid advanced project because some of the concepts can get a little confusing along the way. I even got frustrated a few times when I made the first a-line skirt, but even if you're a beginner you should definitely try it out!! Thanks for reading, lovelies!! <3

xoxo Abby

Saturday, September 5, 2015

~Skincare Review: Kose Softymo Deep Cleansing Oil~

The picture didn't flip!!! T____T Sorry everyone I suck.

Hi everyone! It's September already?!! AHHHHH WHERE DID SUMMER BREAK GO?! I must say, even though I'm starting to get a little sad about break ending I feel like I accomplished a lot this summer. I know I didn't get to do every single thing on my summer goals list, but I still feel proud of what I did manage to accomplish! One of the things I wanted to do a bit more of this summer was blogging! And with that messy transition, let's get to today's review ^>^ lol~

***Hint: TL;DR at the bottom of the post!! <3***

A week or so ago my family felt like eating out and we were craving Korean food, so we decided to hit up H-mart! After a yummy meal in the food court we went inside the actual grocery area and as per usual my sister and I went straight to the snack area. After a bit of wandering we passed through the soap aisle and I found something I had been searching for for a while now!

On a side note, how many of you have been to H-mart? It's a nice Asian grocery market and food court in the Lynnwood area *__* I'm glad it's so close hahaha~ Unfortunately they're moving to a different location so we might not be able to go there as often now 3: Sadness hahaha.

Anyways I wanted to try this cleansing oil out on a whim because it was a decent price and it said "Deep Cleansing" which is what I prefer in my cleansing products. The first time I heard about cleansing oils was from watching a Bubz Beauty video from a long time ago lol. She said she would leave the oil in for a while and massage it in and it was really good for your skin. And I always bought oil free acne cleansers before hearing about this method of moisturizing oily skin, so I thought the idea of cleansing your face with oil was weird. After doing a tiny bit of digging I found out that cleansing oils are a really nice and natural way to remove dirt and makeup without drying out and irritating skin!!

Also look!! I finally found the Tumblr post that inspired me to change my skincare routine!! I'll rave about it more in a separate post but basically it taught me about steaming your face and using cleansing oils! This post and Bubz Beauty really got me into skincare in the first place :3

Screenshot from my favorite skincare post on Tumblr <3 lol I'm weird I know.

Since I bought this oil cleanser on a whim I knew I was also possibly buying a terrible product that could ruin my skin! For example, I just tried out the Sally Hansen facial hair removing strips that come with the pre-waxed strips that you warm up with your hands and just put on and rip off....Yeah that was a terrible experience. I've had trouble with facial hair removers in the past. I used to use the cream Sally Hansen facial hair remover until I discovered it was making my skin red and irritated! So  I don't know why I went along with trying out the strips. It hurt like hell lemme just say that. I'm not used to waxing at all and my skin is sensitive. But I digress. I just wanted to get my skin back to normal after that fiasco! And yet I bought this random oil cleanser at the local market! What?! Yep I'm crazy.

When we got in the car I did a quick search for reviews on the product and they all looked good! YAYY! I was excited and looked up more reviews when we got home before trying it that night :D

Here is what my face looked like before using the cleanser.

Bathroom shot! Right before getting in the shower hahaha~

My current makeup routine is a bit different than the one I posted about in my Get Ready with Me post a while back when school was still going on. Right now it's a bit simpler since it is (erm, was) summer and I preferred lighter makeup.  It's pretty much primer (Smashbox), BB cream+sunblock (at least 30 SPF), setting powder (Skinfood), setting mist (Shiseido), a bit of eyeshadow (Too Faced Chocolate Bar), and sometimes mascara (Clinique) when I'm feeling fancy lol. My summer makeup routine was quite simple :D

I'm pretty sure I didn't use a full pump the first time.
The oil is clear and smells slightly citrusy like oranges!! It's definitely not overpowering at all though. I have a sensitive nose and get nauseous really easily, especially by citrusy scents and car fresheners for some reason?! With that in mind, this scent doesn't bother me at all ^.^ The consistency is quite nice. If you've ever gotten olive oil on your hands while cooking before, it's reminiscent of that but thinner and lighter. It's almost akin to an oily water feeling I'd say?

I started with clean dry hands and a makeup filled face. I didn't put water on my face before putting on the cleansing oil. The directions just say to massage the oil onto your face and then rinse off. So that's what I did! I just pumped the oil in my hands, rubbed them in my hands a bit to warm it up and make it easier to spread on my face without dripping everywhere, and then applied it to my face in massaging circle motions.

Right after massaging the oil into my face >.< 

After letting it sink into my pores and skin for about five minutes.
The feeling of it on your skin is interesting. As an oily skinned person it initially felt weird to me to put MORE oil onto my face. But after awhile it just feels natural. The oil isn't heavy on the skin at all. I can see the makeup being removed from my face as I rub it in, but it doesn't feel like anything special like stuff is being lifted out of my pores when I first put it on.

The magic really happens when you start to rinse the oil off. OMG the first time I rinsed it off in the shower was amazing. Now that we are getting into the cool summer months I take warm showers. The steam really does wonders with the cleansing oil and my pores really felt like they were breathing :o I never thought washing my face with oil would feel so refreshing lol.

I don't think this picture portrays how red my face was after using those strips. Although this was a couple days later it still felt burn-y. 

I felt like one pump was just right for removing the level of makeup I had on. For my personal preference at least. If you're wearing several layers of makeup maybe you should consider using another cleansing product if you don't feel like everything was removed with this the first time. Or perhaps just use another round of this cleansing oil! It's really quite a relaxing experience. Some people even use toner after using cleansing oil if they still feel oily. But I didn't feel oily residue after rinsing my face in the shower :'-D So I skipped toner right after the shower and only used toner right before bed instead.

As far as I know, cleansing oil seems like a  good choice for people of all skin types because it hydrates the skin! Even people with oily skin could benefit from moisture it seems ^.^

I wanted to try it out for a month and tell you about the results, but I just couldn't wait to rave about it lol. And I think after using it almost everyday for about two weeks is enough to do a review on it, right?

My bare face in the morning after using the oil for the past 2 weeks or so~ Acne and redness is clearing (trust me, it was MUCH worse before).

***TL;DR:
For my oily, acne prone, sensitive skin, this cleansing oil has been working really well for my nightly routine! I wear what I would consider "light makeup" on a daily basis pretty much. And once school starts back up and I wear more foundations and eyeliners and creams for the winter months I can see this oil coming in handy!

Scent 10/10: Nice and light! Doesn't seem to bother my nose, eyes, or skin ^.^

Consistency 10/10: I don't feel oily after rinsing this off at all! It's smooth to put on and smooth to take off~

Works 10/10: Since using this oil cleanser my face has felt SOO much better and I can see the acne from the Sally Hansen incident subsiding. Even though the rest of my face is being moisturized I can see the acne drying up and disappearing. No irritation has happened on my skin so far! Which is saying a lot for people with sensitive skin.

Ease of use 10/10: The packaging is really simple and so is the concept! No fancy brushes or fancy method to use this cleansing oil.

Would re-buy 10/10: This is my #1 favorite new nightly cleanser and makeup removing product!! I know it will be a while before I run out of this stuff since there's so much of it and a little goes a long way, but when I do run out I will definitely repurchase! Unless I find anything better (which I don't think I will for a while since I'm so hung up on this one lol).

Thanks for reading through friends!! If you have any questions please don't be afraid to comment down below :D I love hearing from you all ^>^

xoxo Abby